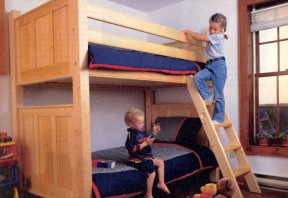
Time was in short supply for me earlier this year, as an impending new baby meant our two boys had to move into the same bedroom. That’s why I tried to buy a bunk bed, although without any success. I couldn’t find anything I liked enough to spend money on. I couldn’t even find a design I wanted to copy. And besides, what kind of a woodworker buys a bed? So after a few spirited design discussions with my wife, and half a dozen crumpled scale drawings, a plan emerged. After building the bed, and tucking our boys in it for more than four months, there’s not much I’d change. I recommend this plan with confidence.
People who see the bed are surprised to learn it’s made almost entirely from construction-grade 2 x 10s. There’s beautiful wood bound for use in house frames, and you’ll save money by redirecting the best of it into your workshop, air drying it and turning it into furniture. The cost of doing business with this under-appreciated material is access to a jointer, thickness planer and tablesaw. You can’t build this project without these machines, so don’t even try.
Start by sorting through the pile of 2 x 10s you carefully selected at the lumberyard, choosing the best for panels, side rails, legs and leg caps. Rough-cut these longer and wider than needed, then stack them with spacers between the layers to promote drying. This is called stickering and you’ll be doing it throughout the building process. Don’t plane or joint any of these parts yet and be especially generous when roughing out the layers of wood you’ll need for the legs. You’ll want to leave lots of extra width for jointing after lamination. Make each leg layer 4 1/2″ wide at this stage. You’ll need this extra width because the legs are long, so it can take many passes across the jointer to get all three layers even and square.
Since construction-grade wood needs time to dry while you're building, I'll lead you through the preparation of parts in stages. Moving from one group of parts to another as you work allows wood to cup and twist (as it inevitably) will while you still have the opportunity to do something about it.
The panels are a prominent part of the bed, so choose and combine grain patterns with care. This is where artistry comes in. Since the finished panes are about 3/8" thick, you can easily get two panel parts by splitting 1 1/2" lumber down the middle, on edge. This leaves lots of extra wood for jointing and planing operations. If you don't have a bandsaw, rip the panel parts no wider than 4", then slice them in half, on edge, in two passes across your tablesaw. Splitting thick stock like this naturally reveals striking book-matched grain patterns on matching parts. This is good stud, so make the most of it.
Next, spend time at the workbench arranging panel parts so they look their best. Mark the location of neighbouring pieces, then set them aside to dry for at least three or four days before jointing and edge gluing. Thin, newly split pieces like these tend to cup as they dry, so you'll want to let that happen before jointing. I designed the completed panes to be less than 12" wide so they could be milled in any benchtop thickness planer after lamination. Set the panel parts aside for now.
Most of the bunk bed parts are 1 1/8" thick, meaning you'll have to spend hours working with your planer to mill the 1 1/2" thick boards down to size. You'll save time if you rough-cut all stiles, rails, bullnose cap strips, side rail support strips, support boards, safety rails and ladder parts to width first, instead of running uncut limner through your planer and then cutting these parts. Joint and plane components to 1/8" thicker than final size, then let them sit for a week with a fan blowing on the stickered pile before milling to final thickness. Keep the parts in separate groups so you can work on each kind in turn.
The bunk bed legs are thick and long, making them the most troublesome part of the project. The plans show how each leg has give parts: three hefty internal layers, caped by two face strips that hide the lamination lines.
Divide the 12 leg layers you cut earlier into four groups: three pieces for each leg. The idea is to arrange the layers so the outer face of each leg looks best. Mark relative layer locations, then joint and plane leg layers to 1 1/4"-thick and glue them together. A few wooden hand screws tightened across the edges of the layers will do wonders to align the parts as the main clamps draw them together. This saves lots of jointing later.
While the leg layers are drying, cut the leg cap strips slightly wider than listed and plane to final 3/16" thickness. When the legs are ready to come out of the clamps, joint and plane them to final size. Glue the cap strips over the sides showing the lamination lines, using as many clamps as needed for gap-free joints. Plane the excess edging flush with the legs, sand and rout a chamfer along all edges. The plans show how the joint line between leg and leg cap disappears if you cut so its edge lands on the joint line.
Joint one face of each panel member, then joint an edge, before ripping each piece to wider-than0final width and jointing this sawn edge. Keep all panel parts grouped, as you arranged them earlier for the best appearance, while dry-fitting the panel parts. When everything looks good, edge-glue the panels, scraping off excess glue after a few hours when it's half-hard.
As the panels are drying, joint and plane the rails and stiles to final size, then trim to length. The plans show how the edges of these parts require grooves to house the panel edges. These grooves also admit floating hardwood tenons that join the panel frames. This is why the panel grooves extend around the ends of the rails. A wing-cutter router bit in a table-mounted router is the best tool for cutting these grooves. Take one pass from each side of the rail and stile parts so the grooves are centred. Aim for a 3/8" -to 7/16" -wide groove, then plane and trip your floating tenons for a snug fit.
Dry-fit all stiles, rails and floating tenons under clamp pressure to check for tight joints, then measure the inside dimensions of the frame (to the bottom of the grooves) to determine the ideal panel size. make the panels 1/16" smaller than these measurements and plane the panels to fit nicely within the grooves. Dry-fit the stiles, rails and panels, then assemble the frame permanently with glue. Give everything a day or two to dry, then joint the outside edges of the frame parts to level and square them.
Mill the bullnose cap strips on a table-mounted router, then fasten them to the top and bottom edifies of the assembled panel frames using 3/8" fluted dowels. With all the parts of this project that needed dowelling, I invested in a self-catering drilling jig to help me bore accurate dowel holes in the panel edges and the ends of the side rails--all parts too large to be bored on my drill press. It worked wonderfully. When the cap strips are glued to the panel frames, run the edge of the assembly over the jointer again, taking a light cut to level the sides for a tight fit with the legs. Install 3/8"-fluted dowels across the leg-to-panel joints, dry-fit under clamping pressure, then join the legs and panel frames permanently. Cleaning glue squeeze-out from the corner where the legs meet the panel frames would be difficult without help. I used Waxilit, a glue resist that looks like skin cream. Smear some acts the dry-fitted joints--when the joint is reassembled with glue the product prevents the squeeze-out from bonding to the surface wood. The hardened glue pops off with a chisel.
The plans show how each leg needs counterbored holes for the bed bolts, and two mortises to house the safety rails for the top bunk. Drilling the holes is easy (just don't do it before you've read further), though the mortises demand explanation. I made mine using a router and flush-trimming bit, guided by the shop-made plywood jig. This creates four identical round-cornered mortises in the legs that need to be squared by hand with a chisel. Use these mortises as a guide to plane, rip and joint the safety rails you rough-cut earlier, so they fit into the mortises sweetly. Complete the rails by sanding, trimming to final length and routing quirk beads on all four edges. These extend to within 1 1/4" of the end of each safety rail.
These parts connect the head and foot boards, and support the two twin-size mattresses that the bed is made for. Mill and trim these parts to final size, then rout quirk beads on all four edges of the side rails, on one edge of the support strips, and along one edge of the support boards. The plans show the details, though you're free to use whatever profile you like.
Before you go further, think about mattress size. Although there are supposed to be standard sizes out there, the variation from brand to brand can be considerable. It's safest to have your mattresses on hand, then measure them and adjust side rail hole locations in the legs, and the side rail lengths, to suit. The dimensions and locations I used are for mattresses that are slightly larger than printed mattress specs.
Drill holes in the legs and side rails for the bed bolts now, then glue and screw the mattress support strips to the inside edge of the side rails. If I had to build my beds over, I'd raise the support strolls 1" higher than where I put them. That's what's shown in the plans. Without an exceptionally thick mattress, the side rails press into your legs as you roll out of bed. Raising the mattresses with the higher support strip location solves the problem.
Test-fit the head and foot boards with the side rails using the bed bolts, but leave the safety rails off for now. Even if the safety rails fit easily into their mortises, they can be tight when they come together in the completed bed. Save this wrestling match for final assembly. I needed an 8' set of pipe clamps to draw the head and foot boards together over the safety rails as the bed came together after finishing.
Cut, sand and rout the support boards, then test-fit them over the support strips. The plans show how the corners of the outer support boards need square notches to fit around the legs. You don't have to fasten them, they just rest loose on the support strips.
When everything looks good, take the bed apart and apply a finish. I chose not to use stain because it highlights dents and scratches when light, unstained wood shows through the damaged areas. And that proofed a good precaution because Joseph, my two-year old, wasn't in his bottom bunk more than five minutes before he sunk his teeth savagely into the silky, hand-rubbed urethane finish I applied.
| Part | Material | Size (T x W x L*) | Qty. |
|---|
Head and foot boards |
|||
|---|---|---|---|
| Legs | 3 1/4" x 3 5/8" x 78" | 1 | |
| Leg cap strips | 3/16" x 3 1/4" x 78" | 8 | |
| Long panels | 3/8" x 9 7/8" x 24 1/2" | 6 | |
| Short panels | 3/8" x 9 7/8" x 17 5/8" | 6 | |
| Long top stiles | 1 1/8" x 2 3/4" x 24" | 4 | |
| Long bottom stiles | 1 1/8" x 2 3/4" x 30 3/4" | 4 | |
| Short top stiles | 1 1/8" x 2 3/4" x 17" | 4 | |
| Short bottom stiles | 1 1/8" x 2 3/4" x 23 3/4" | 4 | |
| Narrow rails | 1 1/8" x 2 3/4" x 33" | 4 | |
| Wide rails | 1 1/8" x 4 1/4" x 33" | 4 | |
| Short floating tenons | 3/8" x 1" x 2 1/4" | 16 | |
| Stile floating tenons | 3/8" x 1" x 1 3/4" | 16 | |
| Long floating tenons | 3/8" x 1" x 3 3/4" | 16 | |
| Bullnose cap strips | 1 1/8" x 2 3/8" x 38 3/8" | 8 | |
| Dowels | 3/8" dia. x 1 1/2" fluted | 40 | |
Mattress support assembly |
|||
|---|---|---|---|
| Side rails | 1 5/16" x 6 7/8" x 76 3/4" | 4 | |
| Side rail support strips | 1 1/8" x 1 3/4" x 76 3/4" | 4 | |
| Support rail screws | brass | #14 x 2: round head | 24 |
| Support boards | 1 1/8" x 3 15/16" x 40 7/8" | 40 | |
| Bed bolts | Lee Valley #05G17.01 | 3/8" dia. x 5"** | 8 |
| Bed bolt caps | hardwood | 1" dia. domed caps | 8 |
Ladder and safety rails |
|||
|---|---|---|---|
| Main ladder steps | |||
| Safety rails | |||
| Long ladder screws and cup washers | |||
| Short ladder screws and cup washers | |||
| Dowels | |||
| **Includes cylindrical brass nuts | |||
* Length indicates grain direction
Recommendations

canadianhomeworkshop.com is part of the Blue Ant Media
Canada Network
© 2024 Blue Ant Media
More information
Social Media & RSS


Our other sites


No comments
To leave a comment, please log in
Don't have an user account? Register for free