Repairing damaged veneers
Try one of these two traditional methods to patch holes in wood or veneer


I remember an incident between my two older brothers during which a skate was thrown (don't ask). Fortunately enough, the intended target dodged the sharpened footwear in time, but the skate hit the wooden bifold door that led to the basement steps and tore a chunk of wood out of it. My two brothers, antagonists moments before, conspired to repair the door before my parents came home, assuming there would be big trouble if the damage was noticed. After the usual finger pointing and blame laying, they put their heads together and came up with a solution. They opened and ate a can of plums, saved and cleaned the pits, and glued the best fitting pit into the gouge. Even the colour matched. My mother never noticed and wasn't told of the incident until years after the house had been sold.
Unfortunately, furniture repairs are not limited to those necessitated by thrown skates, nor are plum pits often the perfect patch material. However, there are two traditional methods I use to patch holes in wood or veneer. I'll limit this discussion to patching veneer, although these methods work equally well for solid wood.
Method 1: Mirror image
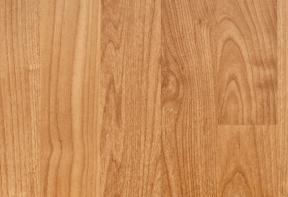
When patching veneer, avoid using circles or shapes with straight lines, as they tend to stand out. An ellipse with pointed ends, a shape known as a marquise, works best as it s not easily noticed as a patch and isn't too difficult to cut.
Buy a piece of veneer (available at specialty hardwood outlets) that is the same species of wood as the surrounding veneer and that has as similar a grain pattern as possible. Draw a marquise on the veneer with the long axis parallel to the grain pattern. Why a marquise? The shape of the patch should avoid straight lines, especially across the grain, because they are so unnatural they draw the eye. The same is true for circles. Irregular organic shapes will make the patch less noticeable, but can be much more difficult to cut. I find an elliptical shape with pointed ends the best compromise. Draw the marquise on the section of the veneer that most closely matches the grain pattern of the veneer surrounding the damage. Make sure that the area covered by the marquise is big enough to completely cover the damage.
Next, cut out the marquise. I use a utility knife and take care to cut with many strokes of the blade. Do not try to cut through the veneer in one or two passes of the knife as it's too hard to control, and cut with the grain where possible. I cut to the line, angling the knife so the cut is slightly undercut. Using a scroll saw will also work.
Use double-sided tape to stick the patch (the marquise) over the damage using as little tape as possible. Be sure the orientation of the grain pattern exactly matches the orientation of the surrounding veneer. Trace the outline of the patch with the utility knife, angling the knife slightly (the same angle as the patch). Hopefully, the angles will give you a tighter fit, therefore a thinner glue line, and a less visible patch. Again, if you press too hard the knife can slip, causing further damage. Cut the outline several times until you have cut through the veneer.
Peel the patch off and remove the tape. If you have used too much tape, it will be difficult to remove the patch without damaging it. Set the patch aside.
Use a sharp chisel, with the chamfered side up, to remove all the veneer inside the outline of the patch. When all the old veneer has been removed, fit the patch into place. Make sure it fits tightly. Ideally, the patch should fit exactly and be proud of the surrounding veneer. If the patch is not proud of the surrounding veneer, do not glue the patch into position. Make a new patch out of a thicker material. Resawing with your bandsaw is usually the best approach.
Assemble the following: wax paper, a piece of plywood or board larger than the patch, glue and something to use as a weight. Use a glue-resist product like Waxilit to prevent glue squeeze-out from staining the surface of your furniture. Spread glue on the underside of the patch and the exposed substrate. Place the patch in position, cover with wax paper, place the plywood or board on top of the paper and put the weight on top of the board. Be careful not to shift the patch while applying the plywood or the weight. If you forget the wax paper, the plywood will be glued to the furniture by the squeeze-out and you'll be in deeper trouble than when you started. Wait 24 hours.
Now comes the tricky part. When you remove the weight, board and paper, the patch will have squeeze-out around it and the patch will be proud of the surrounding veneer. You can use a sanding block and sandpaper to flush the patch, however be extremely careful you do not sand through the veneer surrounding the patch. I prefer to use a smoothing plane with the blade set for a very fine cut, or a sharp cabinet scraper. When the patch is flush, you're finished.
Method 2
This method is quicker and easier. Start by sanding the edges of the damaged veneer until they are gently feathered out to the surrounding veneer. Be careful to sand only the edges of the veneer, not the substrate. The more gradual the slope from the substrate to the top level of the surrounding veneer, the better.
Acquire the appropriate veneer and cut out a patch larger than the damaged area, with the same attention to grain pattern as in the first method. The shape of the patch does not matter.
Assemble the wax paper, glue and weight. In this instance, the pressure from the weight should be concentrated in the centre of the damaged area.
Spread glue on the underside of the patch, and over the damaged area including the exposed substrate and the area feathered out with the sandpaper. Glue the patch in position, as always, making sure the orientation of the grain of the patch matches the surrounding veneer. Wait 24 hours.
Sand the patch flush with the surrounding veneer. This will remove all the excess veneer that is sticking up out of the damaged area. What is left will exactly match the required shape.
I have had problems with the feathered edge of the patch lifting when stain was applied. Make sure the glue used in this method is not going to be affected by the stain or finish. Happy patching, and watch out for flying skates!
To leave a comment, please log in


No comments