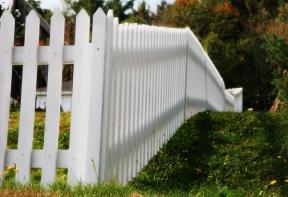
Perfect picket fence
Mark your territory with a well-built fence that will add years of value to your home.


Carpentry is a precarious business. So I steer away from the pitfall that traps many professional carpenters. My first six years in the trade taught me that large, prestigious projects are great for reputation, but can leave you without much more. And although I love working outside, I was disappointed with the quality of typical residential projects.
Now I concentrate on smaller-scale, higher-quality work. By delivering topnotch designs and workmanship, and specializing in outdoor work, I smooth out my marketing efforts, generate a constant flow of work, and deliver lasting value to my clients. This fence is one of those projects, incorporating the experience of building several similar fences.
With a fence, or any outdoor project, you must know thine enemies’water, frost and sun. Standing water will rot your fence, so you need features that encourage quick runoff. Frost will heave your posts unless they’re well-seated, and the sun will beat down and beat up your finish if it’s not prepared.
You’ll need a survey plan if your fence will be near your property line. I use mason’s line tied to 6″ spikes to mark boundaries. If you’re sharing costs with your neighbour, build right on the line. If you’re footing the bill, build your fence far enough on your side to avoid disputes. Fence posts should be evenly spaced, and no more than 8′ apart. White spray paint marks fence post locations on the ground better than anything else.
There’s more to digging post holes than grabbing the nearest shovel. You may find it best to have the 10″-diameter holes dug by a pro with a truck-mounted auger. Most rental shops offer one-man augers which work well, too. I don’t recommend two-man augers–they’re powerful enough to be dangerous. The holes should be 3 1/2′ to 4′ deep.
Digging post holes isn’t a precision operation. Small stones or pockets of tough soil can easily throw an auger out of line. But that’s okay. The post holes are larger than needed so there’ll be room to position the posts along a taut string later. Install both end posts now, following my concrete and dry-pack approach.
With this method, the end posts will be solid enough to support a string stretched between them immediately after installation. Use 3/4″-thick spacer blocks to hold the string away from the posts. Use another piece of 3/4″-thick scrap to position the other posts the same distance from the string. Using spacers prevents one misplaced post from throwing the whole string, and your fence’s alignment, out of whack. Allow two days for the concrete to set solid before the next step’installing the rails.
Crowning Touch
The horizontal fence rails sit on galvanized metal brackets. When selecting rails, assess which edge is crowned, then orient the crown upwards. Wood is imperfect; using it well requires the ability to see, hide and accommodate imperfection. If any rails are crowned more than 5/8″ over an 8′ length, save them for a shorter application. For durability, I apply a layer of paint on the inside of the rails, before installing pickets. This is easier than painting around all those pickets.
Picket Lines
A story pole is a site-cut stick that you mark with dimensions you need often for a particular job, such as installing fence pickets. It gives you more speed and accuracy than a tape measure. A straight line marked across the story pole shows where one edge of the workpiece goes; the X marks which side of the line the picket sits on. Simply butt the end of the story pole against a post, then transfer lines and Xs to the rails.
I keep my pickets simple, yet stylish. These are rounded with a belt sander, to echo the top of each post. While you’re at it, round the posts. Rounding is one way to encourage rain to run off end-grain surfaces, which are most vulnerable to water damage. The plans show how the pickets decrease in height toward the middle of each rail’a style thing. Use two galvanized finishing nails at each end to attach pickets to rails.
Gate Keepers
There are two reasons why gates rarely work smoothly for long. Gate posts often begin to lean under the constant, one-sided load. And the gates themselves usually sag under their own weight. Good design solves these problems.
In this fence, neither gate post can be bolted to a wall, but the arbour that spans the two posts prevents sagging by bracing one post against the other.
Diagonal bracing prevents the gate from sagging. Since wood braces work only under compression, the critical brace extends from the top swinging corner to the bottom post corner. When you measure the width of the gate opening, leave 1″ of clearance on the swing side, and a couple of inches underneath the gate.
Trimming and Finishing
Trim will transform a plain fence into a real property-enhancer. Use a mitre saw to boost the speed and quality of trim installation. Although nails alone will hold trim, glue adds durability. I use outdoor-rated weatherproof carpenter’s glue or polyurethane glue. Take extra care to avoid squeeze-out if you plan to stain’glue never takes stain like wood does.
And a fence that’s built without care and planning will never look as good as this one does, or last as long.
Lawrence Winterburn designs and builds fine outdoor structures from his base near Elmvale, Ont. Plans for many of his projects are available from his website, www.gardenstructure.com.
Jump to a section
- Page 1 : How to build a picket fence
- Page 2 : Picket fence tips from the pros
To leave a comment, please log in


No comments