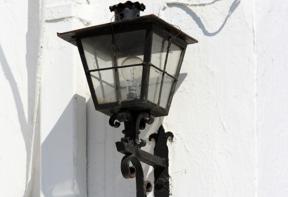
Quickfix: Driveway light
Throw a little light on the subject
What can you really say about the need for outdoor lighting? I mean, it’s a pretty basic concept: if you’ve got a spot that’s in dark that you want a illuminated, put in a light. It’s not the kind of idea that needs 500 words of explanation.
However, the thing about outdoor lighting that’s all-too-often ignored is its aesthetic appeal. How many times have you seen lights on a house (someone else’s, of course) that look like they’ve been there since the thing went up in 1965? Rusted-out husks of builder-quality fixtures covered with cobwebs so thick they have to be cleared away with a machete before you can get a new 100-watt bulb in there. Even if these fixtures have been replaced, it’s often with dubious-looking modern-day replacements like the double-trumpet floodlight or the motion-detecting klieg light that fills your yard with a 5,000 candlepower glare every time a raccoon happens past.
We decided the thing to do was take a step back to the classic simplicity of the humble outdoor coach light. This installation is pretty straightforward and basic, but it’s perfect for the DIYer who hasn’t got a great deal of experience working with electricity.
Get lit
If there isn’t a preexisting light fixture, start by identifying where you want the light to go. Coach lights usually go on either side of a garage door, but you’ll have to make sure you can drill a hole all the way through the wall from the spot you’ve chosen so you can fish the wire through from the inside. Because this is a new installation, we fastened the light to a surface-mounted pancake-style junction box, itself fastened to the wall with Tapcon screws.
Inside the garage, we tapped into an existing light circuit (that of the interior garage light) to power the new light. When you make a connection to an existing power source, you must use a junction box. This we located up high, which allowed us to simply use regular Romex insulated household cable for the bulk of the installation. We used cable ties to fix the cables to a nearby building tie to keep everything looking neat and tidy.
Because the wires that lead to and from the light switch come within 8′ of the floor, we used metal-shielded cable for those areas. The metal-clad cable protects wire from moisture or inadvertent slicing and is flexible enough to wind its way around obstructions. It’s the stuff you generally see strung between fire bells and the like.
Once the light’s wired up and attached to the pancake-style junction box (that’s the one on the outside) you’re in business. Just imagine the luxury of walking up your driveway without having to wonder if you’re about to bark your shins against anything. At the very least, the guy who delivers your pizza will thank you.
What you’ll need
This project doesn’t take a great many tools: Safety glasses, 1″ masonry bit, hammer drill, regular drill with 3/16″ masonry bit, utility knife, wire stripper, tape measure, multi-headed screwdriver. You’ll need some Tapcon screws, cable ties and wire nuts.
To leave a comment, please log in


No comments