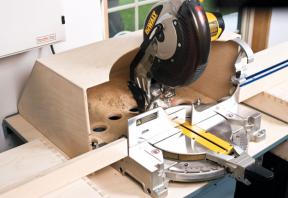
Accurate cut sawbox
This simple-to-build box ensures accurate circular saw cuts
Sometimes it’s the little things-like making a square cut in a reasonable amount of time without fancy equipment-that trip up your project. Even with a handheld circular saw, it’s no picnic. In fact, without experience, making accurate cuts can be more difficult than with a handsaw, at least until you build a sawbox. It guides the tilting base of any circular saw for accuracy. If the box is square, your cuts will be, too-or precisely angled, if that’s what you want. Control is what this custom sawbox delivers.
Any sheet stock will do for this project. I used medium-density fibreboard (MDF), but you could also use exterior-grade ply or Baltic birch ply. Don’t buy anything special. You can use solid wood for the saw support strips and guides, but you’ll need the stability of sheet stock for the box base.
Before building, consider the type of cuts you’ll make with the sawbox. If it’s cutting 2 x 6 decking, for instance, consider a narrow base. If you’re planning to build a picket fence, then a wide base is sensible because you can trim multiple pickets at once. The simplicity of this project allows you to quickly build different sawboxes for different applications, so don’t try to make a one-size-does-all model.
The front and back of the box comes next. Select a width that matches the maximum cutting depth of your saw, plus an allowance for the box base thickness. If you’re building a box for beveled cuts, adjust the front and back to match the reduced cutting depth of a tilted blade. Secure the front and back pieces with #10 x 2″ screws in predrilled holes. Add weatherproof glue.
Next comes the support and guide rails. Join them into L-shaped assemblies before installation and make them long enough to fully support your saw before and after each cut. Use more glue and screws, but this time choose shorter #10 x 1 1/4″ ones so they don’t go right through the parts. Here’s a customization tip: some saw designs have a particularly wide area of swivelling base underneath the motor. If that’s the case, consider widening the support rail on this side. You’ll get better support and a steady saw action. Put the guide assemblies on your sawbox and cut a plywood spacer 1/32″ wider than your saw base and as long as the guides.
Here’s where you need to be careful in two ways. First, the guide assemblies must be square to the front and back members (or true to the angle you want the box to cut). Second, the guide assembly spacing must be parallel and far enough apart so the saw can slide freely but close enough to eliminate any side-to-side saw movement. That’s why the plywood spacer guide is so helpful. Once you cut one, keep it on hand for future sawbox construction. The spacer will be useful for speeding construction and ensuring accurate performance.
Fasten one guide assembly to the front of the sawbox only with glue and a single screw. Now, using a carpenter’s square, swivel the guide rail until it’s exactly 90° to the front of the box and secure it with a second screw into the top of the box back. To position the second guide rail, put the plywood spacer on top and the other guide assembly loose underneath. Adjust the guide tight to the spacer. Glue and screw it down. Now you’re ready to make your first cut, which will also make the slots through the box’s front and back members. Position the edge of the material to be cut tight against the box front and hold it steady with your free hand.
Materials you will need:
Box base (1)
3/4″x 6″-18″ x 25″-35″
Box back/front (2)
3/4″ x 1 1/4″-2 1/2″ x 25″-35″
Saw support rails (2)
3/4″ x 5″ x 25″-35″
Saw guide rails (2)
3/4″ x 2″ x 25″-35″
To leave a comment, please log in


No comments