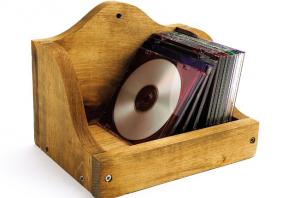
My formula for creating a kid’s woodworking project is to keep it simple and make it useful. A project that can be completed quickly while offering some reason to use it often is more likely to capture a child’s attention. And if you’re lucky, it’ll even be the start of a lifelong interest in woodworking.
To make this CD holder, start by ripping some 3/4"-thick pine to the listed widths, then cross cut the pieces to length with a powered mitre saw. Once these blanks are cut, let your child take over.
Using the grid diagram in the plans as a guide, transfer the curves onto the back and sides.
Show your student how to cut these curves using a scrollsaw, or clamp the pieces in a vise and go at it with a fret or coping saw. Once the cuts are made, smooth any uneven curves using a spindle sander, or sand by hand using 150-grit paper. Assemble the pieces using #8 x 1 1/4" screws. Mark all screw-hole locations and predrill them using a countersinking bit.
Once the project is assembled, add a few coats of finish. For little projects such as this, I prefer an all-in-one stain and varnish product. As I said, simple is good when it comes to kids.
This CD holder looks good on a desk or hung on a wall. If you and your helper feel ambitious, try making several holders and finish them in different colours.
| Part | Material | Size (T x W x L*) | Qty. |
|---|
| Front | pine | 3/4" x 1 5/8" x 9 1/2" | 1 |
| Back | pine | 3/4" x 7 1/2" x 9 1/2" | 1 |
| Sides | pine | 3/4" x 5 3/4" x 5 3/4" | 2 |
| Bottom | pine | 3/4" x 5 3/4" x 8" | 1 |
* Length indicates grain direction
No comments
To leave a comment, please log in
Don't have an user account? Register for free